Showing posts with label kitchen towel hanger. Show all posts

Friday, June 6, 2014

Attaching a button

As I was making another kitchen towel hanger, I thought to myself:  I add beads to knitting,  It shouldn't be that much more difficult to add a button while crocheting.
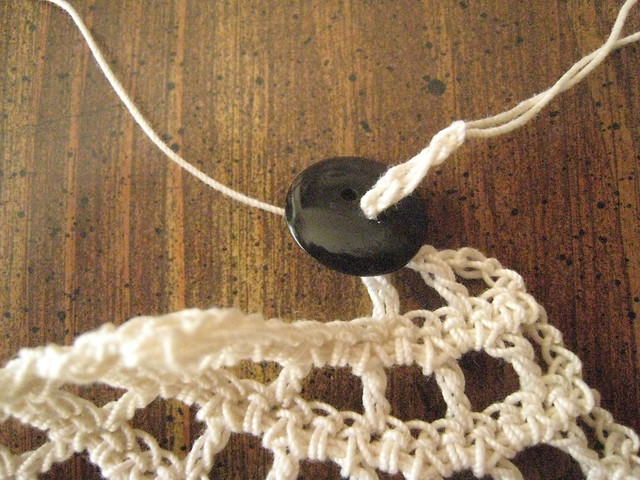
It turned out to be relatively easy.  All one needs to do is pull chain sts through 1 or 2 button holes:
The first image is of ch sts being pulled through the first hole.
The second after pulling ch sts through the 2nd hole.

Finally, the loop is tightened.

Crochet the rest of the row.  In the next row, sc (or dc or tr) 2 sts together - one into the ch sp just before the button and one into the ch sp just after the button.

Monday, September 28, 2009

Picot Edging

First of all, I want to say that I've made this hanging kitchen towel thingie many times and have never given it a picot edging. I've never started and ended the edging with a slip stitch before either. But, there's always a first time for everything.
-- I have always made it with an edging, though.

---

After finishing the buttonhole and weaving in ends, start with thread in the same or a different color. As usual, for starting any crochet project, make a slip knot around the hook. Then to get an almost invisible start to the edging, slip stitch into the bottom of the first sc in the project.

The picture shows the thread after it has been pulled through the bottom of the sc but before it's been pulled through the starting loop. To get the yo through the starting loop more easily, hold one edge of the loop (the part of the loop with the loose end) with your left hand as you pull the thread through. That completes the slip stitch.

Then, sc into the edge of the next row, a sc row.

Make a picot into that sc.

I used the first method of making picots (as described in the American Thread Company brochure excerpt). I chained 3 and then did a slip stitch into the top of the last sc. NexStitch has a nice video of the stitch.

As you can see, it is a bit tricky. That's probably why there is an alternative way to do the picot (as mentioned by both the booklet and NexStitch) -- namely, instead of doing a slip stitch, make another sc (or whatever stitch the picot is on top of) "in the same space" or, in other words, as if one were doing an increase.

Just doing a sc without either the slip stitch or the "increase" would make the picot too open.

One isn't limited to doing just 3 or 4 chains for a picot. It just depends on how large you want it to be. However, with more chain stitches, the inside of the loop of chain stitches becomes more visible, and it comes closer to being a chain loop. One is also not limited to doing picots on top of sc's. It can be done on top of most any stitch. Picots also don't have to be restricted to edgings.

To finish this edging, repeat *sc 4, picot* around.

When adding an edging in knitting, one has to be careful about row and stitch gauge. A knit stitch is about 1 1/2 times wider than it is tall (at least for a gauge of 4 sts and 6 rows per inch). So, the number of stitches to be picked up along a vertical edge is different than the number of rows along that edge. Although, when crocheting along a knitted edge, one generally crochets one stitch for every two knitted rows.

On the other hand, a single crochet stitch is pretty much as tall as it is wide. When crocheting along a vertical edge, crochet 1 st off of a row of sc's and 2 sts off of a row of dc's and 3 sts off of a row of tr's (triple crochet sts), etc. (A dc is about twice as tall as a sc, and a tr is about 3 times as tall.) The picture shows a crocheted edge (plus some picots).

For the buttonhole, crochet as many stitches as were skipped at the bottom of the buttonhole. End the edging with a slip stitch.

To finish, sew on a button. And you have the finished product.

Tuesday, September 15, 2009

a buttonhole

A horizontal crocheted buttonhole is generally made in a row of sc's simply because sc's have a little height but not much. And so, the buttonhole would have a little height but not much. The bottom of the buttonhole is the top of the last row. (Skip as many sts as the buttonhole is wide.) It doesn't have to be a row of sc's as it is here. It could be a mesh or a row of dc's or ....

The top of the buttonhole is made with ch sts.

Here's what the mesh from last week looks like -- unstretched and unblocked. I ended up with 15 sts across. My button is just over 5 sts in width. Then, for this go-around, this is what I did next:

Turn, ch2, sc across.
Turn, ch1, sc4 (I did ch 1 instead of ch 2 to give the edge a more rounded look - a decrease at the beginning of the row as discussed in the previous post. I'm going to end the row with another decrease, sc2tog, to give the other corner a rounded look as well.)

The next question is how many ch sts to make to create a buttonhole.

The general answer is "however many sts skipped". However, at least for me, ch sts stretch more than sc sts. The second picture shows this.


For the third picture, I did 1 fewer ch st than I skipped in the previous row.


And here's the final picture.

The final row is:

Turn, ch 1, sc 4, ch 4, skip 5, sc 4, sc2tog.


However, I want the top narrower. So I frogged the buttonhole row and the sc row before that and worked another mesh row (to take the st count down to 9 from 15.):

Turn, ch2, skip 1, *skip 1, dc, ch1* across, ending with skip 1, double crochet together next st with the third st after that.

(The last step in the dc2tog is shown in the pic.)

Then, the final two rows are
Turn, ch 2, sc across
Turn, ch 1, sc 1, ch 4, skip 5, sc2tog.

After finishing the buttonhole row, it's time to cut the thread and weave in loose ends. NexStitch has a video illustrating this. (I use a crochet hook instead of a needle to draw the yarn or thread under the tops of stitches or through their posts.)

The next step is an edging, to give it a more finished look. The next post is on edging, in general, and also the slip stitch.

Monday, August 31, 2009

Kitchen Towel Hanger, continued

We've now finished the first 3 rows of the kitchen towel hanger:

Row 1: Sc 1 into cloth, *ch 2, sc 1 into cloth* to end.
Row 2: Turn, ch 2, sc 2 in each ch sp across, sc 1.
Row 3. Turn, ch3, dc in next st in previous row, *ch 1, skip 2, dc 1* across, dc 1.

The pattern will, in most likelihood, not work out exactly. So, you can fudge by skipping only 1 st before making the last two dc's of the row or else by ending dc, skip 1, dc.

The ch 2 at the beginning of Row 2 is a substitute for a sc. The ch 3 at the beginning of Row 3 acts as a substitute for a dc. The last st of Row 2 (and also Row 3) is made into the last of the ch sts that started the previous row.

To continue:
Repeat Rows 2-3 until there are somewhere around 10 sts across (between 9 and 15), ending with a Row 3. The picture shows the first repeat of Row 2. The first of 2 sc's is being worked into a ch sp.

Then, we will switch to a different kind of mesh. This mesh doesn't have sc's in alternate rows (which gave the piece the sturdiness needed due to a rapid decrease in width). Instead, each row of the next mesh will have dc's and chain spaces only -- and will keep the same width.

Row 1: Turn, ch 3, *ch 1, skip 1, dc 1* across.
The ch 3 at the beginning of the row serves as a substitute for a dc. The ch 1 creates a ch sp (chain space). So, even though the row starts out with 4 ch sts, it's really a dc substitute plus a ch.
Row 2: Turn, ch3, dc 1, *ch 1, skip 1, dc 1* across, dc 1.
The last dc of the row is made into the last of the 3 ch sts that served as a substitute for a dc in the previous row. The rest of the dc's can either be made into a chain space or into a ch st (whichever, as long as it's consistent). It's much easier to dc into a ch sp than into a ch st.

Repeat these 2 rows for around 5".

For the next step, we'll decrease again -- in preparation for a buttonhole. The next post discusses decreasing, in general terms. The post after that will be on the buttonhole.

Monday, August 24, 2009

Double Crochet

For the next row of the kitchen towel hanger, we'll use double crochet stitches.

The double crochet stitch is about twice the height of a single crochet stitch. (It is called a triple or treble crochet stitch in England and several Commonwealth countries and is then abbreviated tc or 3-c.) In American notation, it is abbreviated dc. The photo at the right is from the American Thread Company booklet and describes the stitch.

In the photo, you can see both the right sides of dc sts (the top row) and the wrong sides (the bottom row).

NexStitch has a video of the stitch. The video shows the dc being made in a chain st (with the hook being put under just one loop of thread). In the pattern we're working on, the dc is made on top of a sc and so (since we want a flat effect instead of a rib effect), put the hook under both loops at the top of the sc in Step 2 below.

The single crochet stitch took 2 steps to complete. The double crochet stitch takes 4 steps. As with most, if not all, crochet sts, one starts with a single loop around the hook -- and ends with a single loop around the hook.

Step 1. Yarn over (yo). That is, wrap the thread around the hook (from the back over the hook to the front). There are 2 loops on the hook.

Step 2. With the yarn in back, put the hook through the top of the desired st (-- or into a chain st, or chain loop, or terry cloth as you did for a single crochet st), yo, and draw the thread through. There are now 3 loops on the hook.

The picture at the right shows the yo in Step 1 and the hook through the top of the stitch that I wanted to dc into. (I skipped 2 sts between dc's because that's what the pattern I'm making calls for.)

Step 3. Yarn over and draw the thread through 2 loops on the hook. There are now 2 loops on the hook.

Step 4. Yarn over and draw the thread through 2 loops. There is now only 1 loop on the hook, and the double crochet is complete.

The picture at the right shows the yo in Step 4. You'll notice that bottom half of the stitch is already made.

-----------

Now to get back to the terry cloth dish towel that we were working on. Row 3 is a row of dc's and ch's -- to give an open mesh effect -- as can be seen in the second and third pics. Here are directions for Row 3:

Row 3. Turn, ch3, dc in next st in previous row, *ch 1, skip 2, dc 1* across, dc in last st.

To explain these steps:
Turn -- Turn the fabric so that now the RS is facing you. We were working on the WS.

Ch 3: Chain 3, as a substitution for a dc.

dc in next st in previous row: Don't dc in the last st of the last row but rather one stitch over. (Sometimes, one just writes dc instead of dc 1.)

*ch 1, skip 2, dc 1* The pattern that is repeated across the row is to first chain 1, the double crochet in the 3rd stitch over from the last stitch crocheted into (to skip 2 sts).

Finally, the pattern will, in most likelihood, not work out exactly. So, you can fudge by skipping only 1 st before making the last two dc's of the row or else by ending dc, skip 1, dc. -- As was the case in the last row, there are fewer sts across than in the previous row.

Monday, August 17, 2009

Single Crochet -- Part 2

In the last installment, we talked about making single crochet stitches with either no foundation row (just a piece of cloth). In this installment, we'll talk about making single crochet stitches in a chain space.

The first row for the kitchen towel hanger has been worked (on the right side/front of the fabric) -- in the previous post. All the sc's were made into the fabric.

Next ch 1 and turn the work. (The ch 1 is a substitute for the first stitch in the next row -- a row of single crochet stitches.) Single crochet twice into each chain space. In the picture, I've already worked 3 chain spaces and am preparing to sc into the next chain space. (The picture shows Step 1 in making the stitch. Step 2 is done just as before.) When I get to the end, I'll single crochet into the top of the last st (which was the first st of the previous row).

Directions for this row are:

Row 2: Turn, ch 1, sc 2 in each ch sp across, sc in last st.

The final picture shows Row 2 worked all the way to the end.

You're probably thinking that you'll end up with fewer stitches than you started out with. And you'd be right. The number of stitches will be decreased by about a third.

If I had wanted to keep the same number of stitches, I would have done one of the following:
Turn, ch 1, *sc 2 in each ch sp, sc in next sc* across
or
Turn, ch 1, sc 3 in each ch sp across
or
Turn, ch 1, sc in each st across
I would have taken the first option. First of all, it's easier to sc into a ch sp than a ch st. Second, it keeps the sts lined up vertically.

Finally, a word about what the top of a stitch looks like. It looks like a chain selvage on the edge of a knitted garment. When the directions say to sc into the next sc, it means to put the hook under the 2 loops on the top of the stitch (as part of Step 1). Then do Step 2 as usual. It really doesn't matter how you crochet the last st of this row, though, since it will be hidden by the edging.

Here (a rippled afghan), is an example of what a crocheted piece looks like when one crochets in the back loops only instead of both loops.

Friday, August 14, 2009

Single Crochet Stitch

Rather than just presenting different crochet sts, I thought it would be good to start off with a project that uses some basic crochet stitches. Our first project, a kitchen towel hanger, uses chain st, single crochet, double crochet, slip st, and picot st.

For this project you'll need some size 10 crochet thread (This project is great for using up left-over thread.), a size B (2.5 mm) hook, and a terrycloth kitchen towel.

To start off, cut the towel in half. We begin the project by working a single crochet stitch into the fabric of the towel (1st picture). Directions for working a single crochet stitch follow:


The single crochet stitch is abbreviated sc in patterns as in sc 2 in next ch sp (single crochet twice in the next chain space) or sc 3 in next st (single crochet 3 times in next st).

A word of warning:
This is American terminology. The British term for the same stitch is double crochet (dc).

As with all crochet stitches, one starts with a single loop on the hook. In the picture at the right, I started with a loop created by making a slip stitch knot around the hook (just as one often does in starting a cast on in knitting).

There are 2 steps to making the stitch.

First, with the yarn in back, draw a loop through. In this case, I used the crochet hook to poke a hole through the terrycloth dish towel. Then I wrapped the thread around the hook and pulled the thread through. (Terrycloth is woven loosely and so it is possible to poke holes through it without snagging the fabric.) There are now 2 loops on the hook.

Second, wrap the thread around the hook again (as in the first picture) and then pull the thread through both loops.

The stitch is complete and one is left with one loop on the hook.

To make the edging, I then did 2 chain sts before making the next single crochet. (Directions for making a ch st are in the previous post.) Directions for this row would be written out as:

Row 1: sc 1, *ch 2, sc 1* to end

The second picture show several repeats of the pattern, ending with a chain 2. The chain 2 forms what is called a chain space. This helps space out the single crochet stitches. The row ends with a single crochet.

Next time, we'll talk about how to single crochet into a chain space and also how to crochet into the top of a single crochet stitch.