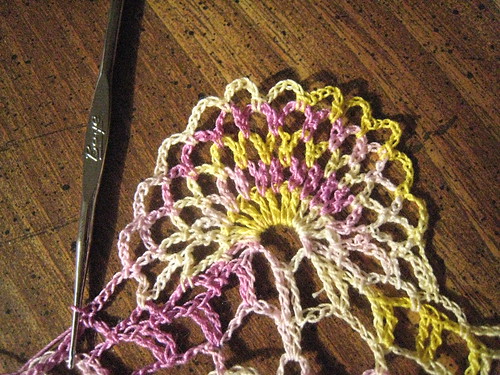
Friday, June 6, 2014

Attaching a button

As I was making another kitchen towel hanger, I thought to myself:  I add beads to knitting,  It shouldn't be that much more difficult to add a button while crocheting.
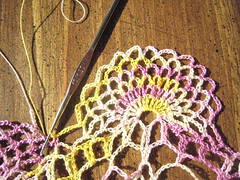
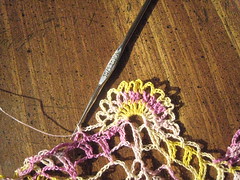
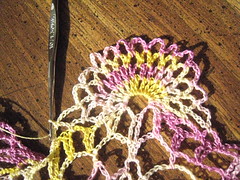
It turned out to be relatively easy.  All one needs to do is pull chain sts through 1 or 2 button holes:
The first image is of ch sts being pulled through the first hole.
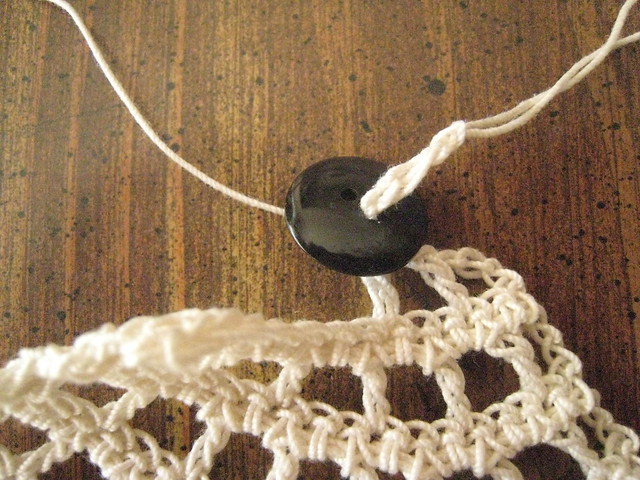
The second after pulling ch sts through the 2nd hole.

Finally, the loop is tightened.

Crochet the rest of the row.  In the next row, sc (or dc or tr) 2 sts together - one into the ch sp just before the button and one into the ch sp just after the button.

Monday, October 10, 2011

the magic number 6

In several previous posts, I've been calling 6 a magic number in crocheting round objects.  It wasn't until this past week that I finally understood where it came from.

I had told him that sc sts are basically square.  And, I was telling him that a person was having trouble with a hotpad pattern because of not making the "correct" number of increases per round.  He guessed that that number should be 6.  I asked him how he knew that, and he replied "simple math".  The circumference of a circle increases by  2 π  for each increase of 1 in radius -- and  2 π  is approximately 6.

Tuesday, March 29, 2011

lace scallop for pineapple doily - part 5

 Now to finish the scallop.

Seventh and last row:
Turn. Skip 1st ch-6 space. * ch 6, sc 1 in next ch-6 sp* 12 times. ch 3.
For the first scallop, break yarn, leaving enough yarn to work an sc. Otherwise, sc 1 in next ch-6 sp (in adjoining scallop). Break yarn and weave in end.

After finishing all but the first scallop, finish the first scallop by working a sc in the adjacent ch-6 sp.  Break yarn and weave in end. 

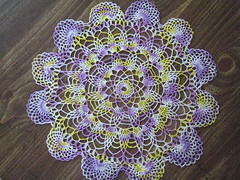
Here's the finished doily.

pineapple doily

Start next scallop 5 ch-5 spaces from the right edge of the last one. The scallops are worked in a clockwise order. The second pic in the first pineapple doily post shows the spacing.

Wednesday, March 23, 2011

lace scallop for pineapple doily - part 4

The scallop is getting larger. So, it's time to replace the ch 5's with ch 6's:

Sixth row:
Turn. Skip 1st ch-5 space. * ch 6, sc 1 in next ch-5 sp* 12 times. ch 6. sc 1 in next ch-5 sp.

pineapple doily scallop, in progress

If this the last scallop, replace the last "sc 1" of row 6 with "join to sc from first scallop". The pic shows the first and last scallop being joined -- with a slip stitch.

Tuesday, March 22, 2011

lace scallop for pineapple doily - part 3

The next few rows are all the same:

Third row:
Turn. Skip 1st ch-5 space. * ch 5, sc 1 in next ch-5 sp* 12 times. ch 5. sc 1 in next ch-5 sp.

pineapple doily scallop, in progress

Fourth and fifth rows:
Turn. Skip 1st ch-5 space. * ch 5, sc 1 in next ch-5 sp* 12 times. ch 5. sc 1 in next ch-5 sp.

pineapple doily scallop, in progress

pineapple doily scallop, in progress

If this had been any scallop except for the first one, replace the last "sc 1" of row 5 with "join to sc from previous scallop".

Row 6 in the next post.

Monday, March 21, 2011

lace scallop for pineapple doily - part 2

The second row of the scallop is worked on the wrong side. Before starting the row, you might want to weave in the loose end. It's easier to weave in now than later.
Second row of the scallop:
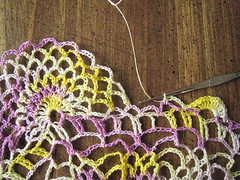
Turn. Skip 1st ch-1 space. * ch 5, sc 1 in next ch-1 sp* 12 times. ch 5. sc 1 in next ch-5 sp.

The ch-5 sp is the one next to the ch-5 sp holding the first sc of Row 1.

Then, it's time to count. There is a ch-5 sp at the beginning of the row and another at the end. In between are 11 ch-5 spaces that look almost like picots. The pic shows the scallop after row 2. (I often chain a few stitches before putting crochet up for a while. Then, I rip them out when ready to start crocheting again.)

Rows 3, 4, and 5 will be in the next post.

Thursday, March 17, 2011

lace scallop for pineapple doily - part 1

I hadn't crocheted lace doilies for ages -- until this month's NerdWars on Ravelry. One of the challenges was to finish a project started by someone else.

I chose my MIL -- who passed away almost 2 decades ago -- and left me with yarn, crochet thread, steel crochet hooks, and booklets.

For the NerdWars challenge, I picked a pineapple pattern doily from one of her books. I used her crochet thread (size 30) and a size 10 (1.5mm) steel crochet hook.

The inner rows of the doily aren't anything special...

But, the scalloped edging is. It transforms what otherwise would be just a plain doily into something exciting.

The last of the inner rows is: * 1 sc in center of ch-3 sp, ch 5 * around. Join.

In order to start the first scallop without the need to fasten off the thread, I ended the row by replacing the last ch 5 with "ch 3, dc in first sc of round".

The first pic show this last "ch-5 sp" plus the beginning of the scallop, a sc into the chain space:

pineapple lace doily

First row of the scallop:
sc in ch-5 sp, * ch 1, dc 1 * 12 times in next ch-5 sp, ch 1, sc 1 in next ch-5 sp, ch 5, sc 1 in next ch-5 sp.

This forms a basic scallop -- plus something extra: ch 5, sc 1. These sts form the beginning of the lace part of the scallop. The second pic shows the entire row plus part of a finished scallop.

pineapple lace doily

Note:
Many scallop patterns would have this basic scallop (or a similar one) repeated around the edge:
sc in ch-5 sp, * ch 1, dc 1 * 12 times in next ch-5 sp, ch 1. Repeat to end (starting with a sc in next ch-5 sp). Join to first sc of row.

This pattern doesn't. Each scallop is worked separately. The second row of the scallop is detailed in the next post.

Thursday, July 15, 2010

a daylily - Part 3

In the previous post, we crocheted the front 3 petals. Now, it's time for the final 3 petals.

Rnd 3 (back petals). * Sc in next Rnd-1 ch-3 sp (crocheting behind Rnd-2 petal), ch 1, sc in next Rnd-1 ch-3 sp (crocheting behind same petal), (ch 1, dc 1 ) 3x in Rnd-2 ch-1 sp, ch 6, sk 1 ch st, sc 1, dc 3, tr 1, (dc 1, ch 1 ) 3x in same ch-1 sp, repeat from * 2 more times (3 petals). Join to 1st sc of rnd.

I think the easiest way to "sc in next Rnd-1 ch-3 sp" is to turn the daylily over. The first picture shows the first sc of the round in progress -- preparing to draw a loop through the ch-3 sp.

Then, keep the daylily turned over. "Chain 1 and then sc 1 in the next ch-3 sp". The next ch sp is in a clockwise direction from the previous one -- since we're working on the wrong side of the daylily.

This completes: "Sc in next Rnd-1 ch-3 sp (crocheting behind Rnd-2 petal), ch 1, sc in next Rnd-1 ch-3 sp (crocheting behind same petal)"

For the petal itself, turn the daylily so the right side is facing and start working in a counterclockwise direction again.

The petal is worked almost the same way petals from the previous round were.

To make matters easier, you'll be starting the scallop part of the petal by crocheting into a ch-1 sp from the second round (instead of crocheting into a dc from the first round).

"(ch 1, dc 1 ) 3x in Rnd-2 ch-1 sp" is the first half of the scallop.

"sk 1 ch st, sc 1, dc 3, tr 1" is the top part of the petal.

Finally, "(dc 1, ch 1 ) 3x in same ch-1 sp" completes the petal.

Then, it's time to turn the flower over and start again.

After the third petal, all that remains is to:

"Join to 1st sc of rnd."

and then:

"Fasten off and weave in loose ends."

The last picture shows the flower from the wrong side just before fastening off.

Wednesday, July 14, 2010

a daylily - Part 2

In the last post, we worked the first round of the pattern. The next round of the daylily pattern is much more complicated than the first:

Rnd 2 (front petals): * Sc in next Rnd-1 ch-3 sp, (ch 1, dc 1 ) 3x in next dc, ch 6, sk 1 ch st, sc 1, dc 3, tr 1, (dc 1, ch 1 ) 3x in same dc, sc in next Rnd-1 ch-3 sp, ch 1, repeat from * 2 more times (3 petals). Join to 1st sc of rnd.

This round begins at the lower right hand corner. It starts out with a sc in one of the ch-3 spaces from the previous round.

The next few stitches are the beginnings of a scallop. Chain once, then double crochet into the top of the next dc from the previous round. Chain again, then double crochet into the same dc. Finally, chain once more and double crochet into the same dc.

Then, we abandon the scallop to create a top for the petal. (This part is a lot like that of the coneflower in a previous post.)

"ch 6" takes one to the top of the top of the petal. Then "sk 1 ch st, sc 1, dc 3, tr 1" -- or, in other words, skip 1 chain stitch - the last chain stitch -, then single crochet into the next chain stitch, double crochet into each of the next 3 chain stitches, and finally triple crochet into the final chain stitch -- to arrive at the base of the top of the petal.

The last few stitches form the end of a scallop.
-- And the first petal is complete.

Two more petals finish off the round. And, we have something that looks a lot like a Triforce (Zelda ref) or trefoil.

In the next post, we'll work the last 3 petals for the flower.

Tuesday, July 13, 2010

a daylily - Part 1

I was never quite happy with my daylily pattern in Three Flowers. I've been thinking about how to improve the pattern ever since. I guess that maybe I wanted something with narrower petals and more of the lightness of Irish crochet. (A picture of the newer version is at the right.)

This is the most difficult of the 3 flowers. It incorporates elements of both of the others. It starts out like the pansy. The tops of the petals are like those of the coneflower. Plus, it adds a couple new elements.

As before, I'm using a size 5 or F (3.75 mm) crochet hook and leftovers from a ball of Peaches & Creme cotton yarn – worsted weight -- in yellow. (Any weight of yarn and hook to match will work.)

This flower is 6" in diameter.

Here's the new version (in 3 posts):

Directions:

Ch 4. Join to form ring (with a slip stitch).

Rnd 1: Ch 6, ( dc 1, ch 3 ) 5 x, join to 3rd ch st of rnd (with a slip stitch).

There are now 6 spokes and 6 chain spaces.

Note that the first 3 chain sts of the "ch 6" at the beginning of the round serve as a replacement for a dc.

The final picture shows the flower at the end of round 1.

In the next post, we'll add the first 3 petals.

Wednesday, March 17, 2010

a coneflower

Happy St Patrick's Day!
Here's a green flower -- a coneflower. This is quick to make -- with only one round of crocheting -- though it looks more complicated. I made it with 13 petals since that's what the simplest coneflowers seemed to have. Besides 13 is a Fibonacci number (and I was taught is school that Fibonacci numbers show up a lot in nature).

The flower begins essentially like the previous hotpads and the pansy – with a chain ring. But, that's where the similarities end.

Note: "sk 1" is an abbreviation for "skip 1". After finishing a length of chain stitches, one usually skips the last chain st (or 2 -- if the next stitch is a dc -- or more).

I used a size 5 or F (3.75 mm) crochet hook and leftovers from a ball of Peaches & Creme cotton yarn – worsted weight -- in light green.

The flower is about 5 " in diameter.

Directions:
Ch 6. Join to form ring (with a slip stitch).

Rnd 1: Ch 10, sk 1, sc 1, dc 6, sc 1 (first petal complete), * sc 1 into ch 6 ring, ch 9, sk 1, sc 1, dc 6, sc 1 (next petal complete), repeat from * 11 more times for a total of 13 petals.

Fasten off and weave in loose end. (The beginning loose end is hidden under the sc's worked into the ring.)

Note: The first petal is different from the rest because the first chain st in the petal is a substitute for a sc. The rest of the petals start out with a sc into the chain ring.

The second picture shows the second petal halfway finished. The sc and 9 ch sts have been worked. 1 chain stitch has been skipped. And the hook is in position to work a sc.

Note: For crocheting into chain stitches, one usually places the hook under only 1 strand (See picture.)

Note: As you crochet more sc's into the ring, you'll have to push the ones already made back toward the first sc -- in order to have enough room for the last ones.

Friday, March 5, 2010

a pansy

This is National Crochet Month and also the month for St. Patrick's Day. Here's a very easy Irish crochet flower, a pansy.

I've been talking about a "rule of thumb" of increasing 6 sts around for each equivalent sc round. This flower, however, has the equivalent of 25 sts around at the end of the first round (instead of the 12 sts that would produce a circle at a dc height).

The flower begins essentially like the previous hotpads – with a chain loop. It also has chain spaces (in Round 1) to give the open look characteristic of Irish crochet.

Since there are only 2 rounds of crocheting, extra height for the petals is made through use of triple crochet sts (described in the last post). The first two petals are rounded with a progression from sc to hdc to dc to tr and then back. The other three petals are squarer with mostly triple crochets (or the equivalent).

The first picture shows the 5 spokes at the center of the flower plus 2 petals. The last sc of the second petal isn't finished for reasons that will become apparent -- with the second picture and the note at the end of the post.

The second picture shows the second petal finished (with blue) and one stitch in the new color to start the third petal.

Here's the pattern:

Pansy

I used a size 5 or F (3.75 mm) crochet hook and leftovers from a couple of balls of Peaches & Creme cotton yarn – worsted weight -- in yellow and blue. Yellow is the color for the center and the first 2 petals.

The flower is about 3 ½ " in diameter.

Instructions:
Ch 4. Join to form ring.

Rnd 1: Ch 7, * dc 1, ch 4 * 4x, join with slip stitch to 3rd st of ch 7. (5 spokes and 5 chain spaces)

Rnd 2: In each of the first 2 chain spaces work "sc 1, hdc 1, dc 1, tr 3, dc 1, hdc 1, sc 1". If desired, change color. In each of the remaining 3 chain spaces work "sc 1, ch 3, tr 2, dc 1, tr 2, ch 3, sc 1".

That's all there is to the pattern -- except for fastening off and weaving in the ends.

There are several ways to change colors. One way is to fasten off the old color and then start with the new. However, for the pansy, I changed colors by just starting to crochet with the new color.

For that method, for the last sc of the second petal, don't draw a loop of yellow through to complete the sc. Instead draw a loop of blue through. (The loop created when finishing a st is the top of the next st. This is shown in the second picture.) That is all there is to it. (One, of course, needs to weave in the ends. But, whatever technique you use, you'd need to do that.)

Note also: Just as the ch 3 (the first part of the ch 7 at the beginning of round 1) is a substitute for dc 1, "sc 1, ch 3" and "ch 3, sc 1" are substitutes for tr 1 (in the blue petals of round 2).

Tuesday, March 2, 2010

Treble Crochet Stitch, etc

I haven't posted anything here for a while. But, since this is National Crochet Month, I thought it would be a good time to start up again. The following post, authored by me, is from Bits and Bobs, the Blog (and is part of my effort to get my crochet posts in one place).


The treble (or triple) crochet stitch is about three times the height of a single crochet stitch. (It is called a double-triple or double-treble crochet stitch in England and several Commonwealth countries and is abbreviated d tr c, dtr, or 4-c.) In American notation, it is abbreviated tc or tr c or tr or 3-c. The photo at the right is from the American Thread Company booklet and shows both the front and back of the stitch.

NexStitch has a video.

(The caption on the picture is for the double treble crochet st -- discussed later.)

This st and the other two sts discussed here are used mainly in lace edgings or doilies, etc and in Irish lace. They're fairly thin with definite space between the sts. They can be used in combination with the sc and dc sts to form shells.

Again, one starts with a single loop on the hook (and ends with a single loop on the hook). The difference is how many yo's to make. For the single crochet st, there was no yo before placing the hook through the top of a st in the previous row (or into a ch sp). For a dc, there was a single yo. For a tr, there are 2 yo's.

Step 1. Yarn over (yo) twice. That is, wrap the thread around the hook twice (from the back over the hook to the front). There are 3 loops on the hook.

Step 2. With the yarn in back, put the hook through the top of the desired st -- or whatever (as you did for a single crochet st), yo, and draw the thread through. There are now 4 loops on the hook.

Step 3. Yarn over and draw the thread through 2 loops on the hook. There are now 3 loops on the hook. (The pic shows the yo part of this step.)

Step 4. Yarn over and draw the thread through 2 loops on the hook. There are now 2 loops on the hook.

Step 5. Yarn over and draw the thread through 2 loops. There is now only 1 loop on the hook, and the treble crochet is complete.

Going further:
One might ask oneself what would happen if one made 3 instead of 2 yo's to start out. The answer is a double treble crochet st -- shown in the pic at the right -- abbreviated dtr or d tr c or 4-c. (It is called a triple treble crochet st in England.) Here is a link to the video at NexStitch. This st is about 4 times the height of a sc. It is not used very often even in lace.

The picture at the right is of the double treble crochet st.

Similarly, one could do 4 yo's to start out. The result is a triple treble crochet st (or treble treble crochet st or tr tr c or trtr or 5-c). NexStitch has a video of this stitch as well. (I assume it would be called a double treble treble crochet st in England.) It's about 5 times the height of a sc.

Tuesday, November 3, 2009

Crocheted cord

Since I've been knitting i-cords recently for the first time for a while, I thought I'd post about a couple alternatives -- a twisted cord and a crocheted cord.

The twisted cord is pretty self-explanatory. To make this, get several strands of string or yarn, anchor one end, and twist the yarn/string from the other end. Bring the ends together, and let the strands twist around each other. Finally, tie a knot where the ends meet to prevent the cord from untwisting.

The other cord, a crocheted cord, is a lot like a knitted i-cord. Here's one way to make the cord:

Make a ch-4 loop.
Rnd 1: sc 6 into loop.
Rnd 2, etc: sc once into back loop of each sc (6 sts)

In other words, start out as if for a spiral hotpad. Then crochet the hotpad as before -- except do not make any increases. Each round consists of 6 sc's. In variation here, stitches are crocheted through back loops only. Crocheting into the back loop (as opposed to crocheting under both loops as we have in every pattern so far) leaves a ridge which spirals around the cord.

The cord in the picture is made in Peaches & Creme and a size 7 (4.50 mm) crochet hook. It's about 3/4 inch in diameter. -- A knitted 6-st i-cord would have a large diameter as well.

To make a narrower crocheted cord (that looks more like a 3-st i-cord):

ch 1.
sc 3 in 2nd chain from hook.
sc in each sc until cord is desired length (3 sc's per round).

Monday, October 26, 2009

Clock Hotpad - part 2

The last round in the main color (from the previous post) was essentially:

* dc1, dc twice into same st, dc 1 * 12 times

for 48 sts around.

For the next round (in a contrasting color, burnt orange), we'll need to identify the stitches from two rounds before (Round 3) into which we dc'ed twice (in Round 4).

Round 5: (in contrasting color) dc in each st around plus work an elongated dc into each stitch in Round 3 that has 2 dc's in it. Slip stitch to end the round (60 sts). Break yarn and weave in ends.

We can start anywhere. But, let's start the next round by dc'ing into a first dc after the dc twice into same st (in the previous rnd).

Put a slip knot around the hook -- making sure to have a long enough loose end to weave in at the end of the round. Wrap the yarn around the hook once. Place the hook through the top of the dc from the previous round. Then continue to make a dc as usual.

Double crochet into the next 2 sts.

Then make an elongated dc.... Wrap the yarn around the hook once. Place the hook through the top of the same stitch in Round 3 that has 2 dc's in it (in Round 4). Wrap the yarn around the hook and pull it through (shown in the picture). Then continue to make a dc as usual.

Double crochet in each of the next 4 sts before making another elongated dc. Continue this pattern until reaching the start of the round. (Since there were 12 increases in the last round, there will be 12 elongated dc's in this round.)

Slip stitch into the top of the first dc of the round.

Finally, cut the yarn and weave in the two ends.

Note: We made 12 increases this round -- just like all the previous rounds. Only, these increases were made by working an elongated dc instead of dc'ing twice into the same st.

Round 6 (in main color): * dc4, dc2 in same space * 12 times. Slip stitch to end round (72 sts). Break yarn and weave in ends.

Edited to change Round 6 repeat from dc5 to dc4 (on Sept 30, 2010).

Start this round just as the previous round. Again, it makes no difference where we start the round. When reaching the end of the round, slip stitch into the top of the first dc of the round. Then cut the yarn and weave in both ends. The hotpad is finished.

Note: We could make more of these elongated dc rounds for a larger hotpad. The only restriction is that an elongated dc round needs to have a "dc2 in same space" round preceding it.

To make an elongated dc round after Round 6:

Round 7 (optional): (in perhaps another contrasting color) dc in each st around plus work an elongated dc into each stitch in Round 5 that has 2 dc's in it. Slip stitch to end the round (84 sts). Break yarn and weave in ends.

Thursday, October 22, 2009

Clock Hotpad - part 1

a circular dc hotpad

For this hotpad, I'm going to break a rule of thumb -- the one on how to substitute for a dc. Usually one substitutes a ch3 for the first dc of a round. I find it nicer in cases like this to substitute "sc1, ch2" instead -- for the simple reason that it looks more like a dc.

This hotpad begins just like the last dc hotpad -- with a ch-4 loop. The increase scheme is exactly the same as before. The "magic" number is still 12. The big difference is that this one is knit circularly instead of in a spiral.

Materials:
size 7 hook (4.5 mm)
2 skeins worsted-weight yarn (I used leftover Peaches & Creme white for the main color and burnt orange for the contrasting color.)

Finished size: 6 1/2" in diameter

Directions:
Using main color, make a ch-4 loop.

(Make a slip knot. ch 4. Slip stitch into 1st chain -- the slip knot -- to complete the loop.)

Rnd 1: sc1, ch2, dc11 into loop. Slip stitch into second ch st of rnd.

In other words, sc1 in the loop. Then ch2. Then dc11 in the loop. As before, when coming to the end of the round, hold the tail next to the chain sts and dc around both the tail and the chain sts to hide the tail.

Finally, since this is circular, make a slip stitch -- to end the round. The first picture show a completed first round.

Round 2: sc1, ch2, dc1 into same st, dc2 into next st 11 times. Slip st into 2nd ch st to end round. (24 sts)

For Round 2, sc1 into the next st. Then ch 2. Then dc into the same st as for the sc. (The second picture shows this.) Then, dc2 into each of the next 11 sts. The round ends as before with a slip stitch.

Round 3: sc1, ch2, dc1 into same st, dc1, * dc2 into next st, dc 1 * 11 times. Slip st into 2nd ch st to end round. (36 sts)

"sc1, ch2, dc1 into same st" is a substitute for dc2 into the same st.

Round 4: sc1, ch2, dc2 into next st, dc 1, * dc 1, dc2 into next st, dc 1 * 11 times. Slip st into 2nd ch st to end round. (48 sts)

"sc1, ch2, dc2 into next st" is a substitute for dc1, then dc2 into next st.

Cut yarn. Weave in loose end.

Next time, we'll start crocheting with a contrasting color, burnt orange. In crocheting, it's often easier to cut the yarn and weave in the end than try to try to hide the yarn when starting a contrasting color.

Tuesday, October 13, 2009

Spiral DC hotpad -- part 2

-- with a "faux slip stitch" --
(The French word "faux" is pronounced like the English word "foe". And, it seems to me, in some cases such as the one here, the imitation is better than the original.)

In the last post, we worked the spiral dc hotpad to the end of the sixth round.

The yarn I was using was left over from a knit dishcloth. So, I decided to crochet this one until running out of yarn.

I did a couple repeats of the pattern for Round 7:

Round 7: * dc twice into same st, dc 5 * 12 times (84 sts)

Then to make the hotpad more circular and less "spiral-ry", I did essentially what I did at the beginning of the spiral (though in the opposite order) -- one half double crochet, two single crochet, and finally a slip stitch.

The first picture shows these stitches plus the beginning of what I'm calling a faux slip stitch -- for lack of a better term. The first time I saw the stitch was at the end of Cat Bordhi's video on Jeny's bind off (knitting).

To work the "faux slip stitch", first cut the yarn. Then draw the yarn through the top of the next stitch (as in the first picture).

After that, draw the loose end through the back loop of the previous stitch (second picture).

Finally, weave in the loose end.

Thursday, October 8, 2009

Spiral DC Hotpad - part 1

Double crochet stitches give a hotpad a different look. This hotpad is worked with a size 7 hook (4.5 mm) and leftover Peaches & Creme yarn (Mar-Di-Gras). It's 7" in diameter.

12 is the "magic" number here. We'll be starting with 12 sts for the first round and increasing by 12 stitches for each round after that.

Directions for the hotpad are in bold. The hotpad starts with a chain loop.

Make a ch 4 loop.

In other words, make a slip knot. ch 4. Slip stitch into 1st chain (ie, the slip knot) to complete the loop.

Then since a dc st is fairly tall, we'll start the first round with a sc and then a hdc. (A hdc, half double crochet st, starts out just like a dc. But, instead of pulling the yarn through 2 loops at a time, one pulls the yarn through all 3 loops to end the stitch. NexStitch has a video of the hdc st.)

Round 1: sc1, hdc1, dc10 in ch loop. (12 sts)

The second picture shows the first 3 sts of the round. When coming to the end of the round, hold the tail next to the chain sts and dc around both the tail and the chain sts in order to hide the tail.

Round 2: dc twice into same st 12 times. (24 sts)
Round 3: * dc twice into same st, dc 1 * 12 times (36 sts)


The third picture shows the hotpad after Round 3. Notice the difference in height between rounds.

Round 4: * dc 1, dc twice into same st, dc 1 * 12 times (48 sts)

Round 5: * dc twice into same st, dc 3 * 12 times (60 sts)

Round 6: * dc 2, dc twice into same st, dc 2 * 12 times (72 sts)


We'll finish the hotpad in the next post.

Monday, October 5, 2009

Spiral Hotpad

-- or "6 is a perfect number"


My aunt Ila was my first crochet teacher. And the first thing I ever crocheted was a hotpad. (I didn't start out with long chains of chain sts but rather with something to use in the kitchen.)

A single crochet spiral hotpad starts with 6 sc sts in the center loop. Then each round after that has an increase 6 sc sts. If you make fewer than 6 increases per round, you'll end up with a cup or bowl shaped object. If you make much more than 6 increases, you'll end up with ruffles.

Something similar holds true for double crochet. A dc st is twice the height of a sc st. To make a circle in dc, start with 12 dc sts in the center loop and then increase 12 dc sts per round. For triple crochet, the "magic" number is 18.

It's difficult to get 12 or 18 sts in a center loop. There are two main ways around the problem. The first is to start with a bigger loop. Instead of crocheting into a ch st, crochet into a 5 or 6 st chain loop. The other method is to replace some of the dc's (or tr's) with ch sts -- ie, work * dc1, ch1 * 6 times in place of the first dc12 (or * tr1, ch2 * 6 times in place of the first tr18).

A Simple Spiral Hotpad
I used Peaches & Creme worsted weight cotton yarn and a size 7 (4.50 mm) hook.
The finished hotpad is almost 7" in diameter.

Rnd 1: Ch 2. Sc 6 in 2nd st from hook. (6 sc)
-- (in other words) Make a slip knot around the hook. Chain 2. Insert the hook into the second st from the hook (ie, the slip knot) and sc. Make 5 more sc's in the same st (ie, the slip knot).
The out-of-focus photo shows the start of the 4
th sc.

Rnd 2: 2 sc in same st 6x (ie, sc twice in each sc from the previous round). (12 sc)

Rnd 3: * 2 sc in same st, sc 1 * 6x (18 sc)

Note: If you wish, you can place a stitch marker on the first st of a rnd to let you know when you're about to start a new rnd.

In the photo, you can see that at the end of rnd 3, there are 18 sts on the outside (by counting the top loops) and that there are 3 rows of sc's.


A lot of patterns for simple spiral hotpads have for the next few rounds:
Rnd 4: * 2 sc in same st, sc 2 * 6x (24 sc)
Rnd 5: * 2 sc in same st, sc 3 * 6x (30 sc)
Rnd 6: * 2 sc in same st, sc 4 * 6x (36 sc)

This produces a hexagon with rounded corners. To get something circular, one needs to vary where one places the increases. Here's a way to do that:

Rnd 4: * sc 2, 2 sc in same st * 6x (24 sc)
Rnd 5: * 2 sc in same st, sc 3 * 6x (30 sc)
Rnd 6: * sc 2, 2 sc in same st, sc 2 * 6x (36 sc)
Rnd 7: * sc 4, 2 sc in same st, sc 1 * 6x (42 sc)
Rnd 8: * sc 6, 2 sc in same st * 6x (48 sc)
Rnd 9: * 2 sc in same st, sc 7 * 6x (54 sc)
Rnd 10: * sc 2, 2 sc in same st, sc 6 * 6x (60 sc)
Rnd 11: * sc 4, 2 sc in same st, sc 5 * 6x (66 sc)
Rnd 12: * sc 6, 2 sc in same st, sc 4 * 6x (72 sc)
Rnd 13: * sc 8, 2 sc in same st, sc 3 * 6x (78 sc)
Make loop: Ch 10 (or more), attach to top of last sc as you would a picot.
Rnd 14: * sc 10, 2 sc in same st, sc 2 * 6x (84 sc), ending with a slip st into the base of the picot-like loop.

For added sturdiness, slip stitch along the chain sts also.

Cut yarn. Weave in loose end.

A final word:
As you work around, you'll find that just before it's time to make an increase, the sts are slanted to the right. After the increase, the sts are slanted to the left.

The way I learned to make hotpads was not to follow a pattern -- but to make an increase when the sts start pulling to the right. (This did work out to about 6 increases per round). Also, if there was a choice about where to place the increase, I learned place it in the middle of a flat edge.

Monday, September 28, 2009

Picot Edging

First of all, I want to say that I've made this hanging kitchen towel thingie many times and have never given it a picot edging. I've never started and ended the edging with a slip stitch before either. But, there's always a first time for everything.
-- I have always made it with an edging, though.

---

After finishing the buttonhole and weaving in ends, start with thread in the same or a different color. As usual, for starting any crochet project, make a slip knot around the hook. Then to get an almost invisible start to the edging, slip stitch into the bottom of the first sc in the project.

The picture shows the thread after it has been pulled through the bottom of the sc but before it's been pulled through the starting loop. To get the yo through the starting loop more easily, hold one edge of the loop (the part of the loop with the loose end) with your left hand as you pull the thread through. That completes the slip stitch.

Then, sc into the edge of the next row, a sc row.

Make a picot into that sc.

I used the first method of making picots (as described in the American Thread Company brochure excerpt). I chained 3 and then did a slip stitch into the top of the last sc. NexStitch has a nice video of the stitch.

As you can see, it is a bit tricky. That's probably why there is an alternative way to do the picot (as mentioned by both the booklet and NexStitch) -- namely, instead of doing a slip stitch, make another sc (or whatever stitch the picot is on top of) "in the same space" or, in other words, as if one were doing an increase.

Just doing a sc without either the slip stitch or the "increase" would make the picot too open.

One isn't limited to doing just 3 or 4 chains for a picot. It just depends on how large you want it to be. However, with more chain stitches, the inside of the loop of chain stitches becomes more visible, and it comes closer to being a chain loop. One is also not limited to doing picots on top of sc's. It can be done on top of most any stitch. Picots also don't have to be restricted to edgings.

To finish this edging, repeat *sc 4, picot* around.

When adding an edging in knitting, one has to be careful about row and stitch gauge. A knit stitch is about 1 1/2 times wider than it is tall (at least for a gauge of 4 sts and 6 rows per inch). So, the number of stitches to be picked up along a vertical edge is different than the number of rows along that edge. Although, when crocheting along a knitted edge, one generally crochets one stitch for every two knitted rows.

On the other hand, a single crochet stitch is pretty much as tall as it is wide. When crocheting along a vertical edge, crochet 1 st off of a row of sc's and 2 sts off of a row of dc's and 3 sts off of a row of tr's (triple crochet sts), etc. (A dc is about twice as tall as a sc, and a tr is about 3 times as tall.) The picture shows a crocheted edge (plus some picots).

For the buttonhole, crochet as many stitches as were skipped at the bottom of the buttonhole. End the edging with a slip stitch.

To finish, sew on a button. And you have the finished product.